05 Aug TP5 Troubleshooting
Integrated Printer
Should the printer stop functioning, follow the steps below to get it working again.
Test the printer by printing a Windows Test Page.
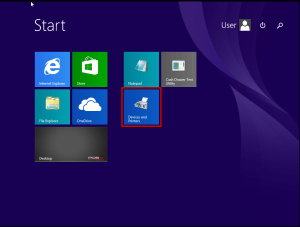
Windows 8.1
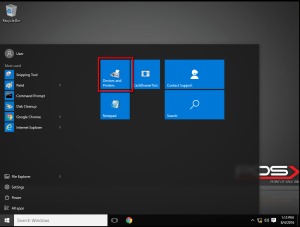
Windows 10
Click Start then Devices and Printers.
Click Start then Devices and Printers.
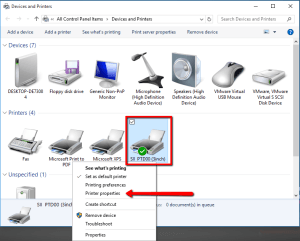
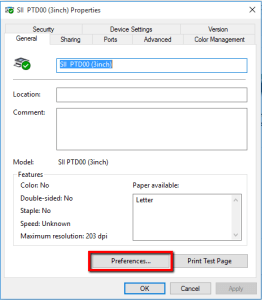
Right click or press and hold on the SII PTD00 (3inch) printer and select Printer Properties.
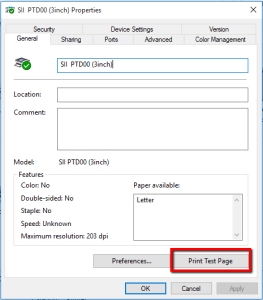
Select Print Test Page.
If the test page prints, the printer is functional and is configured correctly from Windows. Check the software configuration.
NOTE: The test page is designed for a full-size piece of paper, so the test print from the printer will not be formatted correctly.
If the printer is still not printing, resync the printer firmware.
Copy the steps listed above to access the Printer properties window.
Select Preferences.
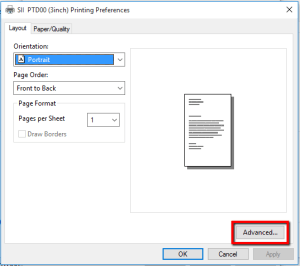
Select Advanced.
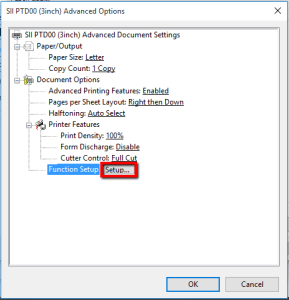
Highlight Function Setup, then select Setup.
The cutter motor will make a sound and the firmware page should populate.
Verify the printer port.
Copy the steps listed above to access the Printer properties window.
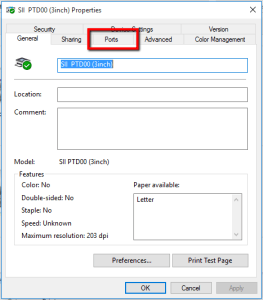
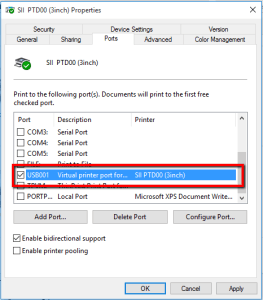
Select the Ports tab.
Verify USB001 is selected as the Port.
NOTE: If the printer has been changed to Serial the correct port will be COM3
Auto Cutter not cutting.
Print a Windows Test page, using the steps listed above, to verify whether the auto cutter cuts the test page.
Using the steps listed above, access the Printer Properties and select Preferences.
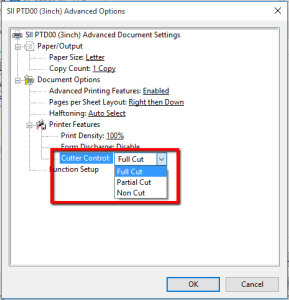
Select Advanced.
Check the Cutter Control setting. For the auto cutter to cut the receipt, this setting should be Full Cut or Partial Cut.
If the Cutter Control setting is set correct we will need to check the printer firmware.
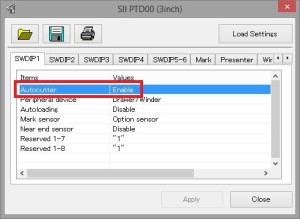
From the Advanced Options window highlight Function Setup and select Setup.
On the main screen that opens, verify Autocutter is set to Enable.
Cash Drawer not opening.
Check for the correct cash drawer cable NOTE: The cash drawer cable is often mistaken for a phone cable as the connectors are the same size. This is the most common issue with cash drawers.
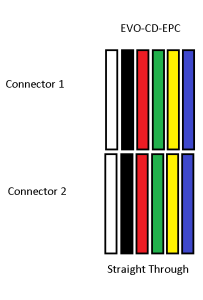
Hold the two connectors next to each other and make sure there are 6 colored wires in each connector and the wires are in the same color order.
Check that the cable is connected to the cash drawer port and not the LAN port. NOTE: If the cash drawer connector is pushed into the LAN port, the LAN port may become damaged.
If none of the steps above alleviate your issues with the TP5, please contact POS-X Customer Service. 360-302-2222 option 5.


